Como en la entrada pasada ya les hable sobre los arduinos y sobre los sensores en esta entrada lo que realize fue probar como funciona y el modo correcto de conectarlo aqui les dejare el ejemplo.
Primeramente lo que se ocupo :
Sensor PIR
Arduino UNO
Cables
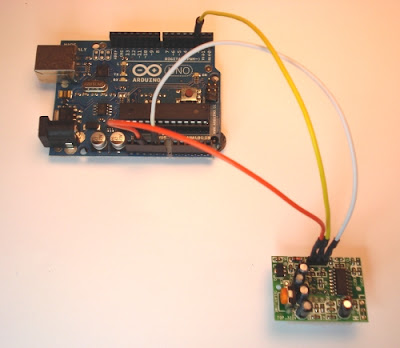
Ahora la forma de conectarla es la siguiente :
Se observa que tiene un lado positivo y uno negativo que van conectados a corriente y tierra directamente en el arduino como uno de salida que va a el numero 2 de el arduino.
Deberia quedar de esta forma ya viendolo en fisico :
Y aqui se puede observar como deberia verse frontalmente.
Ahora no queda mas que introducir el codigo a el arduino y compilarlo.
Por cierto aqui les dejo el codigo que lo encontre en internet
/* PIR sensor tester*/
int ledPin = 13; // choose the pin for the LED
int inputPin = 2; // choose the input pin (for PIR sensor)
int pirState = LOW; // we start, assuming no motion detected
int val = 0; // variable for reading the pin status
void setup() {
pinMode(ledPin, OUTPUT); // declare LED as output
pinMode(inputPin, INPUT); // declare sensor as input
Serial.begin(9600);
}
void loop(){
val = digitalRead(inputPin); // read input value
if (val == HIGH) { // check if the input is HIGH
digitalWrite(ledPin, HIGH); // turn LED ON
if (pirState == LOW) {
// we have just turned on
Serial.println("Motion detected!");
// We only want to print on the output change, not state
pirState = HIGH;
}
} else {
digitalWrite(ledPin, LOW); // turn LED OFF
if (pirState == HIGH){
// we have just turned of
Serial.println("Motion ended!");
// We only want to print on the output change, not state
pirState = LOW;
}
}
}
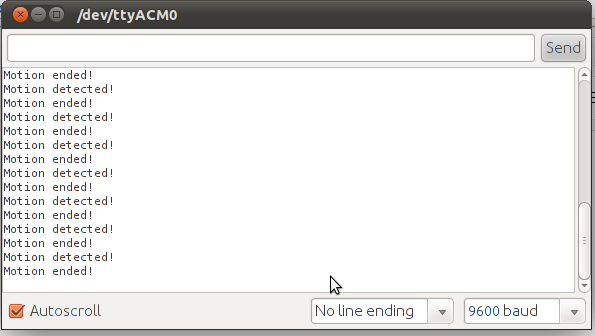
Y aqui esta el resultado final.


7 pts lab integrados
ResponderEliminar